
GRAPHIC DESIGN
VOCABULARY
Quarter 03
Week 19 Week 20 Week 21 Week 22 Week 23 Week 24 Week 25 Week 26 Week 27
Week 28 - Mar.11-15 (NO VOCAB WEEK 28)
Week 19
THE TOOLS OF PHOTOSHOP: MOVE & SELECTION TOOLS
Move Tool * ( V )
The Move Tool is used to move layers, selections and guides within a Photoshop document. Enable "Auto-Select" to automatically select the layer or group you click on.
Artboard Tool ( V )
The Artboard Tool (new in Photoshop CC) allows you to easily design multiple web or UX (user experience) layouts for different devices or screen sizes.
Rectangular Marquee Tool * ( M )
The Rectangular Marquee Tool draws rectangular selection outlines. Press and hold Shift as you drag to draw a square selection.
Elliptical Marquee Tool ( M )
The Elliptical Marquee Tool draws elliptical selection outlines. Press and hold Shift to draw a selection in a perfect circle.
Single Row Marquee Tool
The Single Row Marquee Tool in Photoshop selects a single row of pixels in the image from left to right.
Single Column Marquee Tool
Use the Single Column Marquee Tool to select a single column of pixels from top to bottom.
Lasso Tool * ( L )
With the Lasso Tool, you can draw a freeform selection outline around an object.
Polygonal Lasso Tool ( L )
Click around an object with the Polygonal Lasso Tool to surround it with a polygonal, straight-edged selection outline.
Magnetic Lasso Tool ( L )
The Magnetic Lasso Tool snaps the selection outline to the edges of the object as you move your mouse cursor around it.
Quick Selection Tool * ( W )
The Quick Selection Tool lets you easily select an object simply by painting over it with a brush. Enable "Auto-Enhance" in the Options Bar for better quality selections.
Magic Wand Tool ( W )
Photoshop's Magic Wand Tool selects areas of similar color with a single click. The "Tolerance" value in the Options Bar sets the range of colors that will be selected.


Week 20
THE TOOLS OF PHOTOSHOP: CROP & SLICE TOOLS
Crop Tool * ( C )
Use the Crop Tool in Photoshop to crop an image and remove unwanted areas. Uncheck "Delete Cropped Pixels" in the Options Bar to crop an image non-destructively.
Perspective Crop Tool ( C )
Use the Perspective Crop Tool to both crop an image and fix common distortion or perspective problems.
Slice Tool ( C )
The Slice Tool divides an image or layout into smaller sections (slices) which can be exported and optimized separately.
Slice Select Tool ( C )
Use the Slice Select Tool to select individual slices created with the Slice Tool.
THE TOOLS OF PHOTOSHOP: MEASUREMENT TOOLS
Eyedropper Tool * ( I )
Photoshop's Eyedropper Tool samples colors in an image. Increase "Sample Size" in the Options Bar for a better representation of the sampled area's color.
3D Material Eyedropper Tool ( I )
Use the 3D Material Eyedropper Tool to sample material from a 3D model in Photoshop.
Color Sampler Tool ( I )
The Color Sampler Tool displays color values for the selected (sampled) area in an image. Up to four areas can be sampled at a time. View the color information in Photoshop's Info panel.
Ruler Tool ( I )
The Ruler Tool measures distances, locations and angles. Great for positioning images and elements exactly where you want them.
Note Tool ( I )
The Note Tool allows you to attach text-based notes to your Photoshop document, either for yourself or for others working on the same project. Notes are saved as part of the .PSD file.
Count Tool ( I )
Use the Count Tool to manually count the number of objects in an image, or to have Photoshop automatically count multiple selected areas in the image.


Week 21
THE TOOLS OF PHOTOSHOP: RETOUCHING & PAINTING
Spot Healing Brush Tool * ( J )
The Spot Healing Brush in Photoshop quickly removes blemishes and other minor problem areas in an image. Use a brush size slightly larger than the blemish for best results.
Healing Brush Tool ( J )
The Healing Brush lets you repair larger problem areas in an image by painting over them. Hold Alt (Win) / Option (Mac) and click to sample good texture, then paint over the problem area to repair it.
Patch Tool ( J )
With the Patch Tool, draw a freeform selection outline around a problem area. Then repair it by dragging the selection outline over an area of good texture.
Content-Aware Move Tool ( J )
Use the Content-Aware Move Tool to select and move part of an image to a different area. Photoshop automatically fills in the hole in the original spot using elements from the surrounding areas.
Red Eye Tool ( J )
The Red Eye Tool removes common red eye problems in a photo resulting from camera flash.
Brush Tool * ( B )
The Brush Tool is Photoshop's primary painting tool. Use it to paint brush strokes on a layer or on a layer mask.
Pencil Tool ( B )
The Pencil Tool is another of Photoshop's painting tools. But while the Brush Tool can paint soft-edge brush strokes, the Pencil Tool always paints with hard edges.
Color Replacement Tool ( B )
Use the Color Replacement Tool in Photoshop to easily replace the color of an object with a different color.
Mixer Brush Tool ( B )
Unlike the standard Brush Tool, the Mixer Brush in Photoshop can simulate elements of real painting such as mixing and combining colors, and paint wetness.
Clone Stamp Tool * ( S )
The Clone Stamp Tool is the most basic of Photoshop's retouching tools. It samples pixels from one area of the image and paints them over pixels in another area.
Pattern Stamp Tool ( S )
Use the Pattern Stamp Tool to paint a pattern over the image.
History Brush Tool * ( Y )
The History Brush Tool paints a snapshot from an earlier step (history state) into the current version of the image. Choose the previous state from the History panel.
Art History Brush Tool ( Y )
The Art History Brush also paints a snapshot from an earlier history state into the image, but does so using stylized brush strokes.


Week 22
THE TOOLS OF PHOTOSHOP: RETOUCHING & PAINTING
Eraser Tool * ( E )
The Eraser Tool in Photoshop permanently erases pixels on a layer. It can also be used to paint in a previous history state.
Background Eraser Tool ( E )
The Background Eraser Tool erases areas of similar color in an image by painting over them.
Magic Eraser Tool ( E )
The Magic Eraser Tool is similar to the Magic Wand Tool in that it selects areas of similar color with a single click. But the Magic Eraser Tool then permanently deletes those areas.
Gradient Tool * ( G )
Photoshop's Gradient Tool draws gradual blends between multiple colors. The Gradient Editor lets you create and customize your own gradients.
Paint Bucket Tool ( G )
The Paint Bucket Tool fills an area of similar color with your Foreground color or a pattern. The "Tolerance" value determines the range of colors that will be affected around the area where you clicked.
3D Material Drop Tool ( G )
Used in 3D modeling, the 3D Material Drop Tool lets you sample a material from one area and then drop it into another area of your model, mesh or 3D layer.
Blur Tool *
The Blur Tool blurs and softens areas you paint over with the tool.
Sharpen Tool
The Sharpen Tool sharpens areas you paint over.
Smudge Tool
The Smudge Tool in Photoshop smudges and smears the areas you paint over. It can also be used to create a finger painting effect.
Dodge Tool * ( O )
Paint over areas in the image with the Dodge Tool to lighten them.
Burn Tool ( O )
The Burn Tool will darken the areas you paint over.
Sponge Tool ( O )
Paint over areas with the Sponge Tool to increase or decrease color saturation.


Week 23
THE TOOLS OF PHOTOSHOP: DRAWING & TYPE TOOLS
Pen Tool * ( P )
Photoshop's Pen Tool allows you to draw extremely precise paths, vector shapes or selections.
Freeform Pen Tool ( P )
The Freeform Pen Tool allows you to draw freehand paths or shapes. Anchor points are automatically added to the path as you draw.
Add Anchor Point Tool
Use the Add Anchor Point Tool to add additional anchor points along a path.
Delete Anchor Point Tool
Click on an existing anchor point along a path with the Delete Anchor Point Tool to remove the point.
Convert Point Tool
On a path, click on a smooth anchor point with the Convert Point Tool to convert it to a corner point. Click a corner point to convert it to a smooth point.
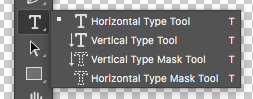
Horizontal Type Tool * ( T )
Known simply as the Type Tool in Photoshop, use the Horizontal Type Tool to add standard type to your document.
Vertical Type Tool ( T )
The Vertical Type Tool adds type vertically from top to bottom.
Vertical Type Mask Tool ( T )
Rather than adding editable text to your document, the Vertical Type Mask Tool creates a selection outline in the shape of vertical type.
Horizontal Type Mask Tool ( T )
Like the Vertical Mask Type Tool, the Horizontal Type Mask Tool creates a selection outline in the shape of type. However, the type is added horizontally rather than vertically.
Path Selection Tool * ( A )
Use the Path Selection Tool (the black arrow) in Photoshop to select and move an entire path at once.
Direct Selection Tool ( A )
Use the Direct Selection Tool (the white arrow) to select and move an individual path segment, anchor point or direction handle.
Rectangle Tool * ( U )
The Rectangle Tool draws rectangular vector shapes, paths or pixel shapes. Press and hold Shift as you drag to force the shape into a perfect square.
Rounded Rectangle Tool ( U )
The Rounded Rectangle Tool is similar to the standard Rectangle Tool but draws the shapes with rounded corners. Press and hold Shift to draw a square with rounded corners.
Ellipse Tool ( U )
The Ellipse Tool draws elliptical vector shapes, paths or pixel shapes. Press and hold Shift as you drag to draw a perfect circle.
Polygon Tool ( U )
The Polygon Tool draws polygonal, straight-edged vector shapes, paths or pixel shapes. Use the "Sides" option in the Options Bar to set the number of sides.
Line Tool ( U )
The Line Tool draws straight lines, either as shapes or paths. The "Weight" option in the Options Bar controls the width of the line.
Custom Shape Tool ( U )
Photoshop's Custom Shape Tool lets you select and draw custom shapes. Choose from Photoshop's built-in custom shapes or create your own.


Week 24
THE TOOLS OF PHOTOSHOP: NAVIGATION TOOLS
Hand Tool * ( H )
The Hand Tool lets us click and drag an image around on the screen to view different areas when zoomed in.
Rotate View Tool ( R )
Use the Rotate View Tool in Photoshop to rotate the canvas so you can view and edit the image from different angles.
Zoom Tool * ( Z )
Click on the image with the Zoom Tool to zoom in on a specific area. Press and hold Alt (Win) / Option (Mac) and click with the Zoom Tool to zoom out.
PHOTOSHOP PALLETTES
Layers
The layers palette lets you see all the layers in your document; lets you organize and arrange your layers, set blending modes, set visibility and opacity of layers, group and merge layers, and many other functions
Adjustments
Your adjustments panel is where you can easily create and edit adjustment layers. Adjustment layers are non-destructive image alterations that affect all the layers below them and can easily be turned on and off. Their most common use is for color correction (namely the Levels and Curves adjustments, but there are many different kinds of adjustments you can perform that can dramatically alter the look of your image.
Color Channels
The color channels palette will let you look at the specific colors that make up your picture. If you're in RGB mode you'll get red, green, and blue. These color channels will differ if you're in a different color space (ex: CMYK). When you choose a specific color, your image will be shown in different versions of black and white. This is because each color channel provides monochromatic images representing the light in each channel (e.g. the red channel is just a look at the red light in your photo). Switching between these different channels is useful for making color channel-specific touch ups, overall contrast enhancements, and also for converting your photo to black and white in a compelling way.
Color Picker
This palette will let you easily alter your foreground and background colors using sliders.
Color Swatches
The color swatches palette is a set of pre-defined colors you can quickly choose from. You can load in several other pre-made swatch collections or create your own, too.
History
The history palette lets you go back in time to undo any previous alterations. The standard undo command (in the edit menu) will simply toggle between undoing and redoing the latest action performed on your image. The history panel is where you can go back much further (50 actions by default).
Text
The text palette, and the paragraph palette below it, let you make all sorts of adjustments to any text you create with the type tool.


Week 25
anti-aliasing - smoothing the jagged appearance of diagonal lines in a bitmapped image; pixels that surround the edges of the line are changed to varying shades of gray or color in order to blend the sharp edge into the background
aqueous coating - a water based sealant applied to printed paper to reduce scratching and fingerprints & enhance visual appearance. aqueous coatings are available in gloss, dull, and satin sheens and are more durable than varnish
blueline - prepress photographic proof made from stripped negatives where all colors show as blue images on white paper. “blueline” is a generic term for proofs made from a variety of materials having identical purposes and similar appearances
collate - to organize printed pages in a specific order
deboss - to press an image into paper so it lies below the surface
desktop publishing - technique of using a personal computer to design images and pages, and assemble type and graphics, then using a laser printer or imagesetter to output the assembled pages onto paper, film or printing plate
embossing - using a hot metal die to press a raised image into an area of paper. Embossed images can be "blind," with foil, or applied to an image already printed with ink
gloss paper - a gloss paper is a coated paper that has a high sheen (most magazines use gloss paper); made with a surface sealant and often contains clay.
ICC profile - a set of data that characterizes a color input or output device, or a color space, according to standards promulgated by the International Color Consortium
ISBN - International Standard Book Number; number assigned to a published work and usually found either on the title page or the back of the title page
matte paper - is a non-glossy, flat-looking coated paper has a smooth surface; made with a surface sealant which often contains clay
Week 26
The 1950's called. They gave me this week's word list. :)
brouhaha — An overexcited response
canoodle — To cuddle or get close to
cantankerous — Overly argumentative or uncooperative
cattywampus — Disorganized, when something is not arranged correctly
cockamamie — Implausible
doozy — Something outstanding, not normal
lickety-split — ASAP
lollygag — To dawdle or be overly slow
malarkey — Nonsense
mollycoddle — To treat someone in a pampered manner
namby-pamby — A person lacking energy and courage
nincompoop — A not-seemingly-bright if not useless person
shenanigan — A mischievous activity
Week 27
REVIEW - We are going to have a week long review of ALL of the vocabulary words we have studied. Be prepared to have a quiz then a 2-part exam in Week 28.